How to Do Reclined Spinal Twist Pose In Yoga, And How To Modify It If You’re An Inflexible Beginner
- Updated on: July 8, 2022
RECLINED TWIST


Purpose
Here are some of the reasons why Reclined Twist is good for you:
- Stretches the back, hips and glutes.
- Increases spinal mobility.
- Opens the shoulders.
- Alleviates back pain and discomfort.
- Stimulates blood circulation for digestive
Pose Guide
In order to do Reclined Twist correctly, here are the steps:
- Begin lying on your back.
- Hug your knees to your chest. Keep the knees aligned with the hips always to have a hip’s width distance between them. Keep the feet aligned with the knees and hips as well.
- Lengthen your spine and engage your core, pressing your low back toward the ground.
- Drop your shoulders toward the ground and relax your neck.
- Using your core to keep your knees in position, open your arms out in a “T” position at shoulder height. The arms will be straight, resting on the ground, with the palms facing the sky.
- Draw your shoulder blades down away from your ears.
- Inhale, pressing your low back toward the ground.
- Exhale as you lower your knees and feet to the right. Keep the legs stacked one on the other as you rest them on the ground. Your hips will be twisted so that the left hip is directly over the right hip.
- Press both shoulders into the ground to anchor the upper body and encourage the spiral rotation in the spine. Try to keep your left hand down, palm up. As you breathe, your arm should be able to get closer to the ground.
- To intensify the stretch, press your right hand on the outside of your left knee. Continue to press the shoulders and upper back into the ground.
- Lengthen your neck, stretching your ears away from your shoulders.
- You should feel a stretch in your outer hip, shoulder, and possibly your biceps.
- Rather than letting your chest puff out, pull your ribs down.
- Turn your head to the left with your left cheek resting on the ground. Direct your gaze toward your left fingers.
- As you inhale, lengthen your spine. As you exhale, engage your core to deepen the twist.
- Repeat on the other side.
Do This, Don’t do That! Common mistakes beginners make:
1. Not engaging the core:
Beginners sometimes forget to engage the core during Reclined Twist. While it can be a relaxing and calming pose, it is still important to keep the core protecting the spine as it twists on its axis. Engaging the core will also provide maximum toning benefits for the abdominals and the digestive organs.
2. Not keeping the knees together in the twist:
It’s important to keep the knees stacked one over the other during the twist to ensure that you’re getting the full benefit of the twist through the hips, glutes and back.
3. Letting one shoulder lift off the ground:
Keeping both shoulders firmly pressing into the ground fixes the upper body to stabilise the twist. Having this anchor allows the entire spine to get the fullest twist, the fullest stretch, possible.
4. Placing the palms down on the ground:
Many beginners make the mistake of placing the palms down on the ground during Reclined Twist. Having the palms down rotates the shoulders forward, which limits the stretch and encourages postural misalignments. The proper form is to have your palms facing the sky so that your shoulders rotate back, opening the chest for maximum stretch and alignment.
5. Arching the low back:
Be careful not to arch the low back in this pose. Sometimes beginners with limited low back, hip or glute flexibility will arch the back and drop the knees away from the shoulders. This can exacerbate incorrect postural patterns, opening the back up for injury. Instead, keep the core and glutes engaged, shifting the glutes toward the knees.
6. Shifting too much weight onto your outer thigh:
Another common mistake is to twist too far so that your bottom hip faces the ground. This fetal-like position is incorrect.
Props and Modifications
You should consider a modification if you experience the following:
- Inability to keep both shoulders on the ground during the twist.
- Pinching in the lower back.
- Discomfort or limitation in the neck.
- Inability to reach knees to the ground.
- Excessive tightness in hip flexors preventing knees from coming to chest.
Modifications
Solutions to the above:
1. Inability to keep both shoulders on the ground during the twist:
The first and simplest modification to make is to reduce how far you are letting your knees drop to the side. You can support your knees with your core or place a bolster or folded blanket beneath your knees for support.

Try placing a folded blanket beneath the shoulder that is raising off the ground. Adjust the folds to the height that will serve you best.
If there’s a large gap between your shoulder and the ground, place a bolster or pillow beneath the shoulder and head.
2. Pinching in the lower back:
The first modification is to adjust the position of your hips so that you are curling your glutes under a bit throughout the entirety of the pose. This flattens the low back, alleviating compression in the vertebrae from arching. Engaging the glutes and lowering them toward your knees will help correct your position.
Alternatively, you can draw your knees closer to your shoulders to foster a long stretch in the back. Be sure to maintain engagement in your core to support and protect the back during the pose.
Decreasing the twist is another option. You can place a bolster or folded blanket under your knees to provide support and lessen the degree of the twist at the hips, thus diminishing the strain on the low back.
3. Discomfort or limitation in the neck:
One simple way to modify Reclined Twist if your neck is uncomfortable in the pose’s full expression is to keep your head centered rather than twisting it away from the knees.
Alternatively, you can twist your head to the same side as your knees to get a gentler stretch in the neck.
If the neck tension stems from an elevated shoulder, you can place a folded blanket or bolster under the raised shoulder and head to relieve the excess tension in the neck.
4. Inability to reach knees to the ground:
The first and simplest modification to make is to reduce how far you are letting your knees drop to the side. You can support your knees with your core, or, if your core is weak, place a bolster or folded blanket beneath your knees for support.
You can also try placing a block beneath your knees to provide some stability and support.
If the resistance is coming more from your hips or glutes, place a block between your knees, resting your lower knee on the ground. This provides some space between your legs to accommodate the lack of flexibility in the upper hip and glutes.

5. Excessive tightness in hip flexors preventing knees from coming to chest:
Try keeping your feet flat on the ground with your knees bent up toward the sky. Initiate the twist from this position without raising your knees to your chest.
Another option is to use a strap behind your knees. You can hold each end of the strap in one hand for more active support or fasten the strap over your shoulders and across your upper back for a more passive assist.
You can also try this pose with the bottom leg straight. Begin lying on your back and bring your right knee to your chest while extending your left leg straight on the ground. Take your left hand to the outside of your right knee and gently pull the right knee toward the right, bringing it to the ground (or as close as you can get it). Use your left hand for support and leverage. The right hip will stack directly over the left hip. Lengthen through the left leg, reaching the toes away from the hip.

Bonus: You can also practice another spinal twist variation by trying out a seated variation called Half Lord Of The Fishes. To begin, start seated on the ground with one leg extended straight. Bend the opposite leg and cross it up and over the extended leg, planting the sole of your foot on the ground and keeping the glutes connected to the ground. Inhale to grow tall in the spine, initiate the twist from the lower ribs rather than the low back on the exhale.
You can use the outside of your arm (same side as an extended leg) to “hook” to the outside of the bent leg to deepen the twist, but avoid cranking your body open using your elbow. You may also hug the bent knee with the opposite arm for a more gentle variation. The arm that is not aiding in the twist (same side as the bent leg) provides stability and helps you maintain an upright position. If you feel any pinching in the lower back, try the seated version on a chair first.


Pointers
Answers To Commonly Asked Questions:
- When is Reclined Twist contraindicated?
- Should I be arching my back in Reclined Twist?
- What do I do if I can’t keep both shoulders on the ground?
- What if I can’t get my knees to the ground?
- What if I feel pinching in my neck?
- How far should I be twisting in Reclined Twist?
- Is this good for the low back or the middle back?
- How long should I hold this pose?
- How much weight should I put in the hand pressing down on the knee/legs?
1. When is Reclined Twist contraindicated?
- Acute spinal injury, including disc maladies.
- Acute shoulder injury.
- Acute sciatic inflammation.
- Pregnancy – consult your healthcare provider.
- Acute hip or glute injury.
- ·Dislocated ribs
2. Should I be arching my back in Reclined Twist?
- No, Reclined Twist is not a back-bending pose. Instead, the hips should be neutral or even slightly curled under.
3. What if I can’t get my knees to the ground?
- This is a common occurrence, especially for beginners. You can modify the pose to get the support you need for the knees while still enjoying the many benefits of the pose. See the modifications section above for options on how you can modify Reclined Twist safely and comfortably for your body.
4. What if I feel pinching in my neck?
- Come out of the pose if you feel pinching in your neck and try a modified version that will support your head and neck. See the modifications section above to find a version of the pose that feels good for you.
5. How far should I be twisting in Reclined Twist?
- You only need to twist as far as necessary to feel a stretch. If you cannot get your shoulders or knees to the ground in the fullest expression of the pose, you can always modify the pose to make it more comfortable and safe for your body. The section above offers several modifications for different body requirements. Find one that works for you.
6. Is this good for the low back or the middle back?
- This pose is good for the entire back. It stretches the spine in a spiralling rotational stretch which benefits the upper, middle and lowers back.
7. How long should I hold this pose?
- As with any pose, you can hold it as long as it feels comfortable for you. A good starting point would be to hold for 5-10 full breaths, then increase the duration from there as your body becomes more comfortable in the pose.
8. How much weight should I put in the hand pressing down on the knee/legs?
- This hand is only for additional support. It should not be exerting a great deal of weight or force. Just use it to provide enough resistance to give you a stretch that feels good in your body.
Additional Resources for beginners
Recent Posts
Categories
Related Articles
Breathing technique to improve your yoga practice
Benefits of yoga before bed
Taking the next step to more challenging yoga
Hatha vs Power yoga
Related Articles
Stretching and Strengthening your hips
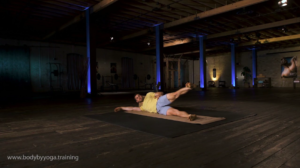
In this workout we start slow to warm up your hips. Utilizing low impact workouts like this can be important for beginners and yoga veterans

Hatha vs Power yoga
We’ve created our own unique style of slow burn power yoga that combines Hatha yoga, power yoga, bodyweight exercises and physical therapy. This way in
The importance of maintaining correct alignment
Everything in your body is connected, so when one muscle isnt aligned properly it can be a slippery slope to injury. Building a solid foundation
