
Incredible Reasons why Dancer Pose is Good for You
- Stretches and strengthens feet and legs
- Strengthens glutes
- Stretches and strengthens core
- Opens chest and shoulders, improving mobility
- Improves balance and stability
- Increases focus and concentration
Do’s
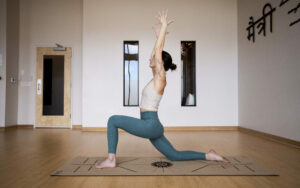
In order to do the Dancer Pose correctly, here are the steps:

- Begin standing in the center of your mat facing the short edge. Place your feet hip’s width apart.
- Lengthen your spine, and engage your core.
- Squeeze your thighs together, rotate them in toward each other, and lift them up toward your hips to fully activate your legs.
- Shift your weight into your left foot. Bend the right knee, lifting the heel toward your glutes. Squeeze your heel toward your glutes in a controlled way (don’t just swing it up).
- Turn your right palm out so that your biceps face out, and reach back to grab the big toe side of your right foot.
- Square your shoulders and hips toward the front short edge of your mat. Keep your knee moving toward the standing leg so that it stays in line with your hip.
- Press your right foot away from your glutes as you slide your knee further behind you, always keeping it in line with your hip.
- Engage your glutes, lengthen your spine and engage your core as you reach your left hand up overhead. The arm will be straight, but not locked, and your palm will face forward.
- Hinge forward at the hips, bringing your torso as far as you need to in order to feel a stretch in the legs. Keep the chest open and lifted while hinging, creating a wide arch in the back.
- Draw your left shoulder back and your right shoulder forward to bring them back to square.
- Press through your left foot, while also pressing your right foot and right hand against each other. This will further activate the pose, and will provide additional support for balancing.
- Gaze forward at a stationary focal point for balance.
- Repeat on the other side.
Don’ts
Common Mistakes Beginners Make


Letting the hips twist out of alignment: It’s common to see beginners twisting the hips in Dancer Pose that the hip of the raised leg is twisting out toward the back of the body. This can give the illusion of getting a fuller stretch. But it’s just an illusion. Twisting the hips actually keeps you from getting the deep stretch in the hip flexors.
The correct form is to keep your hips squared to the front short edge of your mat. Squeezing your thighs and rotating them in toward each other can help keep your hips in the proper alignment.


Twisting the shoulders: It’s also common to allow the shoulders to rotate toward the bent leg. Not only does this position you so that you are missing some of the key stretching opportunities in the pose, but it also makes balancing that much more difficult. Keep your shoulders squared forward toward the front short edge of your mat to maintain proper form.

Locking the standing knee: Locking the standing knee during balancing poses such as Dancer Pose puts unnecessary strain on the knee joint and decreases stability in the leg, making balancing much more difficult. It also cheats the muscles of the legs out of the strength-building benefits of the pose. Instead of locking the standing knee, keep some softness by bending it just a little.
Letting the raised knee open out to the side: It’s common, especially for those with tight quadriceps and hip flexors, to let the bent knee open out to the side away from the midline of the body. This position of the knee leaves you missing the stretching benefits of the front of the legs and abdomen. It also makes balancing much harder. Keep the bent knee moving in toward the midline of the body so that it stays in line with the hip.
Letting the chest droop forward: Be mindful not to let your chest get lazy and droop down toward the floor in this pose. Even though the torso is leaning forward, the core should remain engaged and the chest open and lifted. This supports the spine while stretching the muscles on the front of the body.

Unevenly distributing weight on the standing foot: It’s important to evenly distribute your weight throughout the entire standing foot. It’s common to let the weight tip forward toward the toes. This makes balancing unnecessarily difficult, and puts additional strain on the standing leg and hips. Press down through all parts of your foot from the toes to the balls to the heels.
Gripping raised foot on the wrong side: One common mistake is to grab the raised foot from the outside via the pinky toe. When doing it this way, your palm will be facing your body. Instead, drop your arm to your side and externally rotate your bicep so that your palms are facing away from your body. Then, grab your raised foot from the big toe side. You’ll know you are doing it correctly if your palm is facing away from your body.

Reason for Modification
You should consider a modification if you experience the following:
- Overly tight or shortened hamstrings
- Overly tight or shortened quadriceps
- Knee replacement or other knee limitations
- Excessive tension in the back, particularly the lower back
- Difficulty maintaining balance


Overly tight or shortened hamstrings:
To accommodate tight hamstrings in Dancer Pose, decrease the bend in the torso. This will reduce the stretch at the back of the standing thigh while still allowing you to get the rest of the benefits of the pose.

Alternatively, you can place the back of a folding chair in front of you so that you can rest your hands on the back of it to support the dancer pose and have more control over how much you are hinging at the hip and stretching the hamstrings.

Overly tight or shortened hip flexors:
If the front of your thighs are tight and restrictive, you may find it challenging to find the full expression of the dancer pose. One modification you can try is to use a strap for support. Loop one end of the strap around your bent foot or ankle. Take the other end of the strap in your hand, adjusting the length of the strap to your comfort level.

Another variation is to practice Dancer Pose with a folding chair placed a couple feet behind you at the start of the pose. Instead of taking your hand to your raised foot, place the top of the raised foot on the seat of the chair. The hand can rest on your hip or at your side.
Knee replacement or other knee limitations:
The same modifications used for overly tight or shortened hip flexors can be applied for knee issues. See Overly Tight or Shortened Quadriceps above for modification options if you’ve had a knee replacement or have other knee limitations.
Excessive tension in the back, particularly the lower back:
If you feel any pinching or discomfort in the back during Dancer Pose, an easy remedy is to engage your core and lower your chest a little closer to the ground to flatten the back. Decreasing the backbend will help protect your back while still affording you all the benefits of the pose.

Alternatively, you can decrease the strain in the back by lessening the stretch in the front of the bent thigh. Try using a strap to create more space between your hand and foot in order to loosen the stretch as much as you need to alleviate excess tension in the back.

Difficulty maintaining balance:
If you have difficulty maintaining balance during Dancer Pose, place the back of a folding chair in front of you so that you can rest your hands on the back of the chair to support the pose.
Alternatively, you can practice this pose with the support of a wall. Begin the pose facing a wall, standing about 3 feet away from it. As you’re building the pose, you can place your free hand against the wall for stability.
Common Questions
- When is Dancer Pose contraindicated?
- What do I do if I can’t reach my hand to my foot behind me?
- What do I do if I feel a pinching in my back in Dancer Pose?
- How high should I lift my back leg?
- How much should I lift the chest?
- Can I bend my knee?
- How do I know if my hips are squared?
- What do I do if I feel cramping in my leg and what could that cramping mean?
- How far forward does one bend?
- Is the primary goal a quadricep stretch?
When is Dancer contraindicated?
Acute foot, knee or hip injury
Acute back or shoulder injury
Injury in the groin
Carpal Tunnel Syndrome
Slipped disc, bulging disc, or other spinal injury
Hernia
What do I do if I can’t reach my hand to my foot behind me?
If you can’t reach your hand to your foot behind you, you can use a strap to bridge the gap. Loop one end of the strap around your foot, and grab the other end of the strap with your hand at a position that gives you a comfortable stretch without straining.
What do I do if I feel a pinching in my back in Dancer?
If you are feeling a pinching in your back, stop the pose, and look to the modifications section above to find a suitable variation of the pose that will provide a safer way to practice this posture.
How high should I lift my back leg?
You only need to lift your back leg as high as you need to feel a sustainable, comfortable stretch.
How much should I lift the chest?
Lift the chest just enough to keep the spine elongated and the chest open. Be careful to avoid compressing the spine.
Can I bend my knee?
Yes. See the modifications section above on how to safely make this modification.
How do I know if my hips are squared?
They will both be facing forward so that one side is not further in front of or behind the other.
What do I do if I feel cramping in my leg and what could that cramping mean?
If you feel cramping in your leg, or any acute pain during this or any pose, stop the pose and rest. The cramping could indicate a simple muscle spasm, or it could be indicative of something more serious. Consult your primary care physician if the cramping continues.
How far forward does one bend?
You only need to bend as far forward as necessary to get a stretch in the legs and hips.
Is the primary goal a quadricep stretch?
If your quadriceps are tight, this is a very good stretch to help create flexibility and mobility. As with any pose, the primary benefits will depend on your particular body, and where you are tight, inflexible, weak or strong


Stretching and Strengthening your hips
In this workout we start slow to warm up your hips. Utilizing low impact workouts like this can be important for beginners and yoga veterans
Hatha vs Power yoga
We’ve created our own unique style of slow burn power yoga that combines Hatha yoga, power yoga, bodyweight exercises and physical therapy. This way in
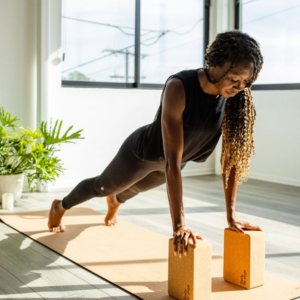
The importance of maintaining correct alignment
Everything in your body is connected, so when one muscle isnt aligned properly it can be a slippery slope to injury. Building a solid foundation