BRIDGE POSE

Purpose
Here are some of the reasons why Bridge Pose is good for you:
- Stretches the neck and spine.
- Opens the chest and shoulders.
- Strengthens the legs, hips and glutes.
- Stimulates blood circulation for digestive organs.
- Strengthens and stretches core muscles.
- Alleviates mental stress and brain fatigue.
- Increases circulation.
- Stimulates the body, reducing signs of fatigue.
- Improves spinal mobility
- Counter the sitting position
Pose Guide
In order to do Bridge Pose correctly, here are the steps:

- Begin by lying on your back with your arms resting at your sides.
- Bend your knees, planting your feet on the ground about two inches away from your glutes. Keep your feet aligned with your hips (hip’s width apart).
- Stack your knees directly over your heels. Point your toes directly in front of your heels so that your feet are parallel to each other.
- Press your feet firmly against the ground making sure that the pressure is evenly distributed at the big toe, little toe and heel.
- Engage your core, lengthen your spine and squeeze your glutes to flatten your low back.
- Draw your shoulders toward your heels.
- Squeeze your glutes and hamstrings while pressing your feet and hands against the ground to lift your hips off the ground and up toward the sky.
- You should be lifting with your glutes, not your spine. Do not arch your back.
- Squeeze your inner thighs toward one another to keep the knees in line with the hips and feet.
- Squeeze your heels toward your shoulders as if you are pulling your upper body forward to try to lift the glutes a little higher.
- If you are having issues finding the strength in the glutes, you can try poking your glutes with your fingers to encourage activation.
- Lift your chest toward the sky as you press the outer parts of your shoulders against the ground.
- Bring your hands together on the ground beneath the middle of your low back. Interlace your fingers.
- Stretch your ears away from your shoulders to lengthen and protect your neck. The weight of the upper body will be on the shoulders, not on the neck.
- Squeeze your glutes to keep your butt elevated.
- Continue to lengthen the spine and engage the core for the duration.
- You should be feeling it in the glutes and the back of your thighs. If you don’t just yet, note that it does take a little while to develop the awareness to feel those muscles. Practicing this Pose on a regular basis is going to help with that.
Practical Tips
Do This, Not That! Common mistakes beginners make in bridge pose:


1. Not engaging the inner thighs:
It’s common for beginners to forget to engage the inner thighs in Bridge Pose. However, the inner thighs are instrumental in providing stability and balance in this Pose and maintaining proper alignment. Be sure to keep them fully engaged as you practice Bridge Pose by squeezing them in toward each other.
2. Letting the knees sway out away from each other:
It’s also common to see the knees swaying out away from each other in this Pose. When this happens, the quadriceps and hip flexors are missing the stretching benefits, and the glutes don’t have to work as hard. Make sure you’re keeping your knees in line with your hips and feet by squeezing the thighs toward one another.


3. Forgetting to engage the core:
Even though Bridge Pose is a back-bending pose, it is still necessary to employ the front of the body by engaging the core. This will provide strength in the core and protect the back from overarching, which can lead to injury and discomfort.
4. Forgetting to engage the glutes:
Some beginners forget to engage the glutes in Bridge Pose since so much work is happening in the legs. However, the glutes are huge stabilization muscles and are needed to keep the structural integrity of the Pose.
Keeping the glutes actively engaged also helps to keep the hips and knees in the proper position for the safest experience of the Pose.
5. Feet rolling onto outer edges:
Another common mistake is allowing the feet to roll out onto the outer edges so that the arches rise off the ground. This opens up the ankles and knees for possible injury. It also diminishes the strengthening and stretching benefits of the Pose. Avoid this error by making sure you are evenly distributing the pressure in your feet between the toes and heels.
6. Hips drooping toward the ground:
It’s common to find the hips drooping toward the ground in Bridge Pose. This is especially true for those with tight low back and hip flexor muscles. Focusing on pressing the feet into the ground, engaging the core and flattening the back can combat this error. Keeping the thighs engaged will provide additional support as you lift the hips.


7. Collapsing chest:
As most of the Pose activity is happening in the lower body, it’s easy to allow the chest to collapse. This can place unnecessary strain on the neck and shoulders and should be avoided. For best form, lift the chest toward the sky and press the outer shoulders into the ground, leaving the neck soft and relaxed.


8. Arching the back:
In order to protect the low back and create the proper engagement in the glutes, hips and legs, you will need to make sure you are not overarching the back. The way to avoid excessive arching is to squeeze your hips toward one another, reaching your tailbone toward your knees, and keeping your back flat. Drawing your ribs in tight can help to keep a straight line between your knees and your shoulders.


Props and Modifications
You should consider a modification if you experience the following:
- Weakness in the quadriceps and hip flexors.
- Discomfort in the knees.
- Pinching in the lower back.
- Discomfort in the neck and shoulders.
- Weak core musculature.
Modifications
1. Weakness in the quadriceps and hip flexors:
If your thighs are weak, try walking your feet further away from your glutes so that your feet are 1-2 inches in front of your knees. This can help distribute the weight a little more fully through the legs while the thighs are building the strength needed to support the full expression of the Pose.

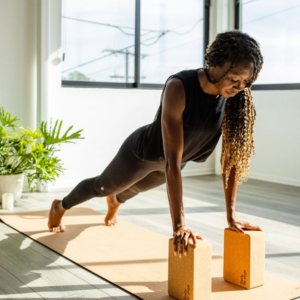
Alternatively, try placing a block between your knees. Adjust the position of the block so that your knees can remain as close to the hip’s width distance as possible. This usually means the shortest edges of the block will be resting against your inner knees. Squeeze the block with your legs, press your feet into the ground, and tighten your core as you lift your hips. Your stomach muscles should be engaged. Squeezing a block has the added benefit of helping to prevent the knees from swaying out away from each other.
The block can be placed between your thighs as well. There isn’t a significant difference between having the block between your knees or your thighs. Either placement will engage the thighs. It can just feel more comfortable for some people to place the block between the knees since the inner thighs are often softer and fleshier and, therefore, more sensitive to the hard edges of the block.

You can also place a block beneath you to help support the weight of your hips if your legs are too weak to support it freestanding. To do this, position the block horizontally under your back to directly under your belly button. Adjust the height of the block to your comfort level. If you feel any tingling or numbness during this modification, try adjusting the placement of the block lower under your back. The goal of the block is to support your lower back. Let your lower back rest on the block.

2. Discomfort in the knees:
Try walking your feet further away from your glutes so that your feet are 1-2 inches in front of your knees. This can help distribute the weight a little more fully through the legs, decreasing the angle of flexion at the knee and alleviating some strain on the knee joints.
You can also try squeezing a block between your knees to encourage the fullest activation of your thigh muscles. Engaging these muscles provides optimal support for the knee joints.
3. Pinching in the lower back:
Placing a block beneath your hips can provide helpful support if you find that you are overarching your low back. Be sure not to rely solely on the support of the block, though. Continue to engage the core, thighs and feet to build the strength needed to practice the fullest expression of the pose eventually.
4. Discomfort in the neck and shoulders:
Using a strap in your hands can help alleviate discomfort in your neck and shoulders during Bridge Pose. Place the strap beneath your back so that it is closer to your feet than to your shoulders. Grab the strap with each hand so that your palms are facing each other. Adjust your hand position on the strap to get the hands as close to each other as possible. Continue to actively reach your hands toward each other while holding the strap, adjusting your hand position as needed.
Placing a folded blanket or towel under your shoulders, neck, and head can provide a cushion if you’re feeling discomfort from these areas being in direct contact with the ground.
Some people also find that placing a rolled hand towel under the neck curve can provide enough support to alleviate discomfort here during Bridge Pose.
5. Weak core musculature:
If you’re having difficulty keeping your core engaged during this Pose, you can modify the pose by placing a block beneath your tailbone to help support the weight of your hips. Continue to engage the core to the best of your ability to build the strength needed to find the full expression of the Pose eventually.
Alternatively, you can place a block between the knees. Squeezing the block with your knees activates your thighs, supporting the core during this load-bearing Pose.
Pointers
Answers To Commonly Asked Questions:
- When is Bridge Pose contraindicated?
- Should I be arching my back in Bridge Pose?
- Where am I supposed to position my feet in Bridge Pose?
- What if I feel pain in my neck during Bridge Pose?
1. When is Bridge Pose contraindicated?
- Acute back, hip or leg injury.
- Acute neck or shoulder injury.
- Uncontrolled blood pressure imbalances.
- Excessive/chronic anterior pelvic tilt.
- Hernia.
- Pregnancy – consult your healthcare provider.
- Acute inflammation of digestive organs – consult your healthcare provider.
2. Should I be arching my back in Bridge Pose?
- The entire spine will be creating an arch, but it is important not to overarch the low back by letting the hips drop down toward the ground. There should be some space between each vertebra of the spine. Keep the hips lifting and the legs and core engaged to avoid spinal compression.
3. Where am I supposed to position my feet in Bridge Pose?
- Your feet should be placed so that your heels are about 2 inches away from your glutes. Align your toes directly in front of your heels, your heels directly in front of your hips, and your knees directly above your feet. Make sure you aren’t rolling your feet out and lifting the inner edges. Instead, anchor your feet evenly with your toes and heels.
4. What if I feel pain in my neck during Bridge Pose?
- If you feel pain in your neck, stop the Pose and find a modification to the Pose. Refer to the section above for modification options.
Additional Resources for beginners


Stretching and Strengthening your hips
In this workout we start slow to warm up your hips. Utilizing low impact workouts like this can be important for beginners and yoga veterans
Hatha vs Power yoga
We’ve created our own unique style of slow burn power yoga that combines Hatha yoga, power yoga, bodyweight exercises and physical therapy. This way in
The importance of maintaining correct alignment
Everything in your body is connected, so when one muscle isnt aligned properly it can be a slippery slope to injury. Building a solid foundation